Showing posts with label home. Show all posts

Thursday, March 6, 2014

giving thanks 2013


Only a few months late, but for Thanksgiving, I had the most to be thankful for… a trip home!  I brought Gunnar back to the states for 2 weeks (it ended up being almost a month, but we'll get to that).  We enjoyed our time with family, and my little boy loved running around on the farm with his pups again.
Sisters.
 SciWorks with Mimi and Bepa


 Puppy love.


I knew 2 weeks wouldn't be long enough of a visit, and as it turns out, Delta had the same thing in mind.  To make a VERY long story short… After a series of delays over 2 days of trying to get on a plane back to Australia, I threw in the towel and got rebooked on a flight leaving 11 days after, and 2 states north of when and where I was originally supposed to fly from.  This was because Patrick and I were virtually flip-flopping.  I was scheduled to arrive down under the day before he was to fly to Maryland.  I opted to fly back with him.  I think it saved everyone a whole lot of stress.  Unfortunately for Gunnar and I, our bags didn't get the memo about the delays and ended up in Sydney without us.  After a week, and a few shopping sprees on Delta's tab, we got them back, relatively unscathed.  

We were sad to leave, and are counting the days until we get to go back!  We love everyone back in the US, especially you guys, Jack and Win!

Sunday, August 18, 2013

what we've been up to...

Hi there!  So recently, we've been busy... relaxing.  Pat was away for 2 weeks working hard, and although he still works hard, the hours are much nicer than we are used to.  We make big plans for projects on the weekends, but the time passes and we wonder where the days went.  It's nice though, because we are accomplishing things, but we aren't rushing to do so.

This weekend's project was to make Gunnar a play tent.  We used the directions from this blog (I found it on Pinterest, of course).  We had a few set backs (like buying a 20mm spade bit to drill a hole for our 20mm PVC pipe, only to find the pipe was actually 25mm), but all in all I think it turned out pretty well.  And the boy loves it, and really that's all that matters.


Other than that we've been spending a lot of time outside.  Let me tell you.  The Australians know how to do winter.  Been in the 70s almost every day.  Sunny all the time.  Rained once in the last two weeks, and it was at night (so we got the benefits of filling up our rainwater tank without being stuck inside all day).


Guns took this one :)

In other news, our HHG shipment apparently arrived in the country a little over a week ago.  We are hoping it gets through customs quickly and painlessly (i.e. we won't have to pay to destroy or fumigate anything).  Stay tuned for more on that.  PS:  I can't wait to finally have all of our stuff!

And I finished some more projects... finally getting around to getting some of our wonderful wedding photos on display, I am working on a gallery wall for our bedroom, and I am slowly collecting thrift shop frames and performing (navy blue) face lifts on them...
I also had a change of heart regarding the color of my wooden tray.  I lied in this post, it was orangey.  Now it's a lemon yellow.  And it's perfect.
And for the biggest project to date, our new entertainment center!  We took an old, plain desk and hutch, removed the drawers and a shelf, and added some decorative moulding and some matte paint... and here you have it:


Can't wait to fill the shelf with Aussie goodies!

Thursday, July 25, 2013

flipping furniture

I've been keeping myself busy here in the land down under by upcycling furniture.  First was the headboard project, which luckily took all of 10 minutes (once I had the supplies).  The rest was not so easy... It has taken several weeks of searching Gumtree (Aussie's version of Craigslist) for used pieces of furniture that fit the vision I already had.  I managed to find a side table and a tv cabinet that would be perfect for mismatched nightstands.  I don't know why but I've been obsessed with the idea of mismatched nightstands.  The end result I can thank Pinterest for, but the beginning was not pretty...

I bought linens already (which are currently sitting in our FPO box just waiting for Patrick to bring them home to me), and (not that you care) they are a dusty (grey) blue, and a ginger color (think really dark coral).  So I wanted the nightstands to be blue so as to add a pop of color to the otherwise very neutral (tan and white) bedroom.  The blue I bought did NOT turn out how I was hoping, and I thought Patrick would kill me if I sanded it down and repainted.  Luckily, I found some crazy linens at Target that matched it perfectly (and our orange rug that we have in our shipment) and voila! we had a side table for the guest room, and linens to boot.  I slapped some new hardware on and everything was just right.  It is now dubbed "the table from Ipswich"...

Before:

 After:


As for our bedroom, I only had the one side table, and the task for finding the perfectly mismatched match began again.  I found an online silent auction for used furniture, which had an awesome antique table, and I bid on a whim, not knowing dimensions or anything.  Low and behold, I won, and I started to have buyer's remorse.  But once I picked it up and got it home and next to the other table; they were made for each other.  Since I clearly couldn't find a blue paint I liked, I opted for the tan/white neutral pattern, but wanted some way to make them stand out.  Thanks to Pinterest, I found tables with tan tops and white bottoms that I loved, but I also loved some with stripes.  So I figured I'd try and mix the two ideas and hope it wasn't "too much".  For the sake of keeping it simple, I opted for the original hardware.  The finished product?  I'm obsessed.

Before:

 After:


The last thing is a wooden tray I also picked up from the online auction, nothing fancy, but it will eventually fit in with our new living room...
Before:
After:

It's not as orangey as it looks in the photo, it's very golden.  

Stay tuned for more projects, and finished room reveals.  I've been very inspired by my new favorite Aussie show, The Block.  

Thursday, July 18, 2013

diy: headboard

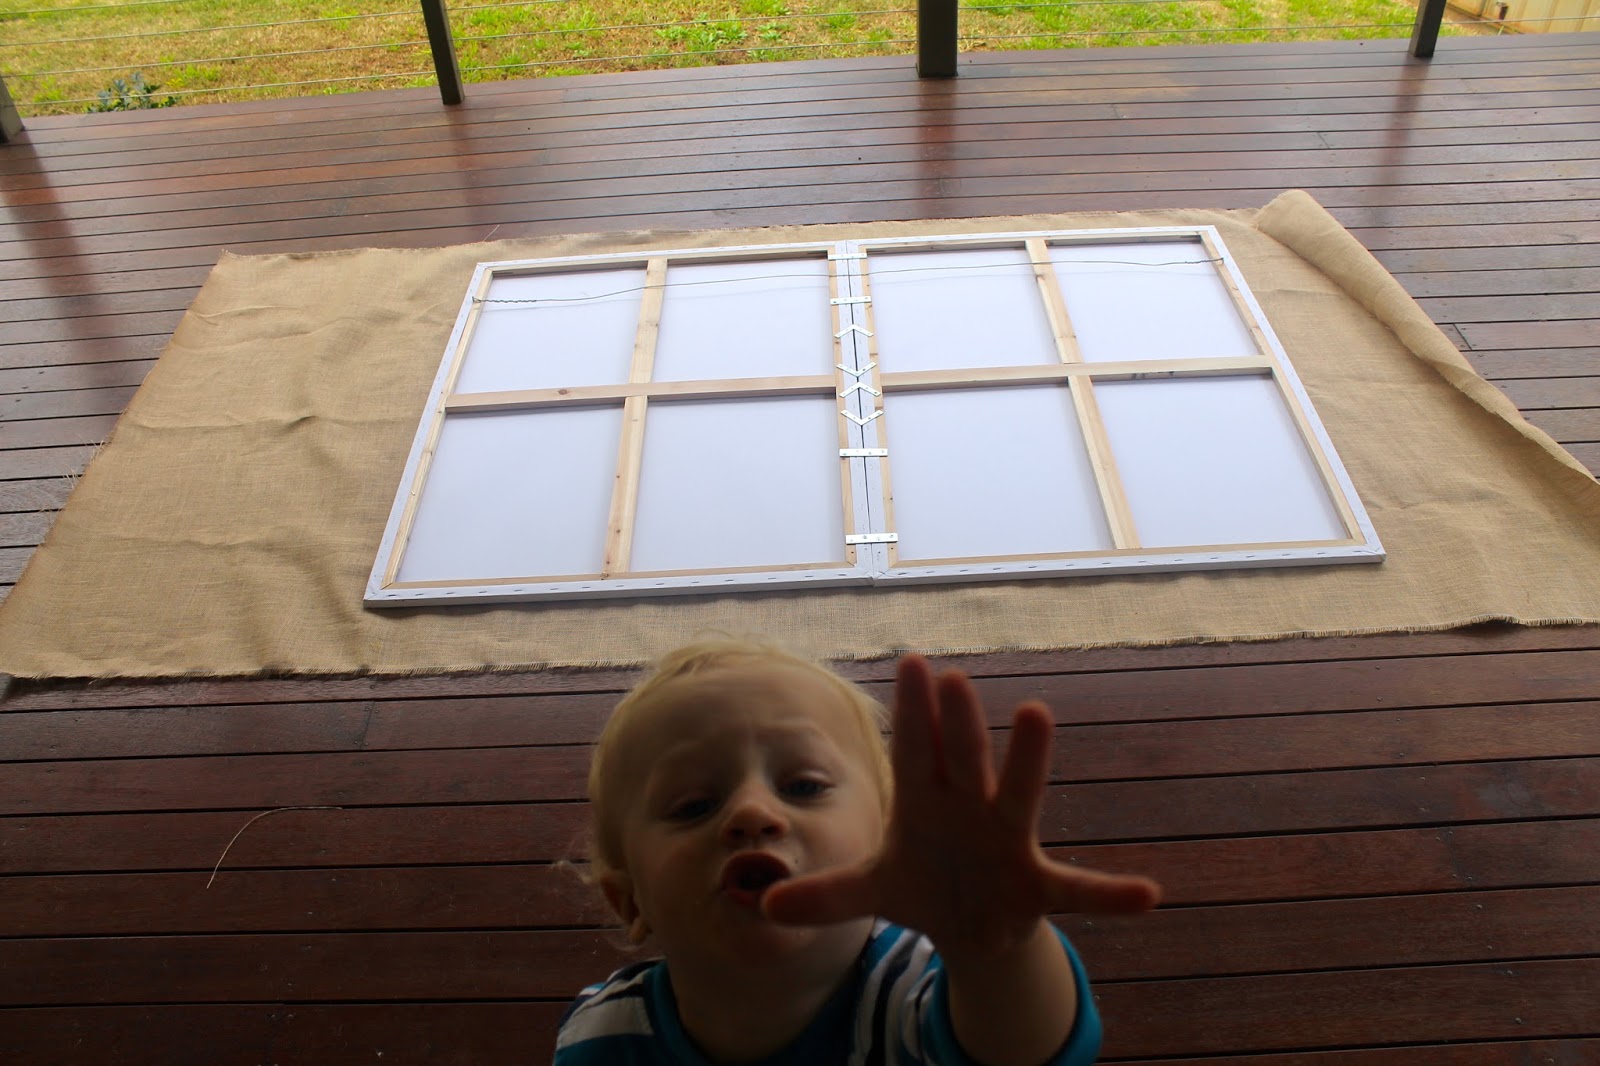
Pinterest is full of ideas for making your own headboard, and it has some downright professional ones.  Curved wood, tufted, you name it, they've got it.  I'm no where near that level, and since I can't drill into the wall in our new (rented) home I had to think of how I could hang a headboard that would be supported by a 3M removable hook.  Enter:  canvas.

What I used:  two canvases (75cm x 100cm each), 2.5m burlap, assorted brackets and screws, picture wire, 3M hooks, staples and a staple gun.


We found the 2 canvases for super cheap at "the reject shop", and then Patrick attached them with brackets, and strung picture wire tightly across:

Then I covered it with burlap fabric, with some help from my assistant:


And here's the before and after (disregard the messy bed):


It's nothing special, but it'll do!